
How to Use Claude Code in VS Code
If you've been wondering how to use Claude Code in VS Code, you're not alone. Since Anthropic officially launched the Claude Code extension for Visual Studio Code, developers have been switching from other AI coding assistants at a rapid pace and for good reason. This isn't just another autocomplete plugin. It's a full AI coding agent that lives inside your editor, understands your entire codebase, and can write, edit, debug, and refactor code with a level of reasoning that feels genuinely different.
This guide is going to walk you through everything: Claude Code Installation Failed? what Claude Code actually is, why it matters for your VS Code workflow, how to install and configure it from scratch, and the practical techniques that separate power users from people who install it and forget about it. Whether you're a seasoned developer or someone newer to AI coding tools, by the end of this article you'll have Claude Code running and working hard in your editor.
What Is Claude Code And What Does "Claude Code in VS Code" Actually Mean?
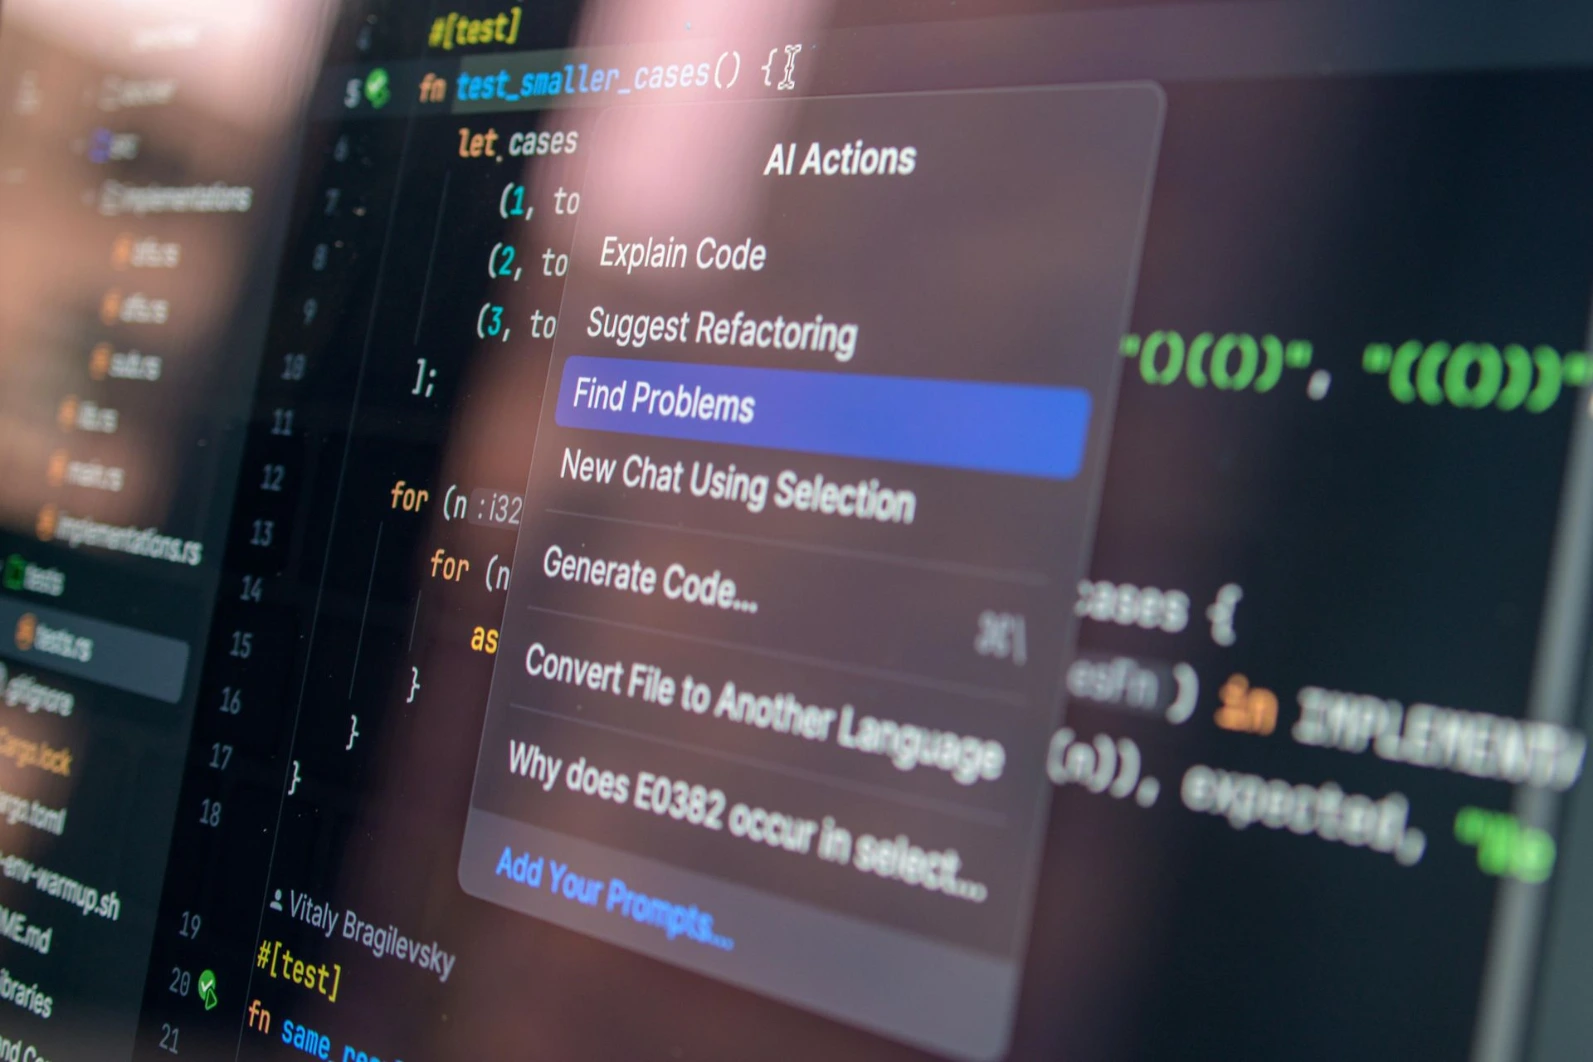
Before we get into setup steps, it's worth clarifying something that confuses a lot of people. Claude Code is Anthropic's official AI coding agent. It started as a command-line tool (CLI) but now has a native VS Code extension that gives you a full graphical interface directly inside your IDE.
This means you don't need to juggle a terminal window alongside your editor. Cursor AI vs GitHub The extension embeds a chat panel inside VS Code, shows you inline diffs when Claude wants to edit a file, lets you reference specific files and line numbers using @-mentions, and maintains conversation history across sessions.

The VS Code extension is the recommended way to use Claude Code for most developers. It wraps the same underlying CLI engine but adds visual features that make the experience much more comfortable for day-to-day coding:
Inline diff view so you can review proposed changes before accepting them
Plan mode where Claude describes what it's going to do and waits for your approval before touching a single file
Session history so you can pick up conversations where you left off
Multi-tab support for running parallel conversations on separate tasks
@-mention file referencing with line-level precision
Think of it as GitHub Copilot's autocomplete, but replaced with a reasoning model that actually understands context, trade-offs, and the "why" behind code decisions.
Why Claude Code in VS Code Matters for Developers
This matters because the way developers interact with AI tools is fundamentally shifting. Early tools were passive; they suggested code and you accepted or rejected it. Claude Code is active. You give it a task, it makes a plan, executes changes across multiple files, runs commands, and reports back.

AI developer workflow illustration
Here's why this VS Code integration specifically is a big deal:
Codebase awareness. Claude Code reads your actual files. When you ask it to refactor a function, it looks at how that function is used elsewhere in your project before touching anything. It doesn't operate on isolated snippets.
Reasoning-heavy tasks. Claude (the underlying model) is exceptionally strong at explaining trade-offs, catching edge cases, and thinking through problems step by step. This makes it genuinely useful for tasks like debugging async issues, designing system architecture, or reviewing pull requests, not just generating boilerplate.
Tight editor integration. Because it's embedded in VS Code, you don't break your flow. Highlight a piece of code, press Option+K (Mac) or Alt+K (Windows/Linux), and Claude instantly has context about exactly what you're looking at.
Privacy by design. Your code is used to provide assistance but is not used to train Anthropic's models, which matters for developers working in commercial or proprietary environments.
Step-by-Step: How to Install and Set Up Claude Code in VS Code
Step 1: Check Your VS Code Version
Claude Code requires VS Code 1.98.0 or higher. To check your version, open VS Code and go to Help → About. If you're behind, updating before continuing the extension simply won't work on older versions.
Step 2: Install the Extension
There are two ways to install it:

Option A — Direct install link: Open this URL in your browser or paste it into VS Code's address bar:
vscode:extension/anthropic.claude-code |
Option B — Extensions marketplace:
Press Cmd+Shift+X (Mac) or Ctrl+Shift+X (Windows/Linux) to open the Extensions panel
Search for "Claude Code" — look for the one published by Anthropic
Click Install
If you use Cursor, Windsurf, or another VS Code fork, the same extension installs through their respective marketplaces or via the Open VSX registry.
If the extension doesn't appear after installation, run "Developer: Reload Window" from the Command Palette (Cmd+Shift+P / Ctrl+Shift+P).
Step 3: Sign In
The first time you open the Claude Code panel, a sign-in screen appears. Click Sign in and complete the authorization in your browser. You'll need an Anthropic account (either a Claude.ai subscription or API access through the Anthropic Console).

One important note: if you have an ANTHROPIC_API_KEY set in your shell environment but still see the sign-in prompt, VS Code may not have inherited your shell's environment variables. The fix is to launch VS Code from a terminal:
bash code . |
This ensures VS Code picks up your environment, including any API keys you've set.
Step 4: Open the Claude Code Panel
Look for the Spark icon (⚡) in the top-right corner of any open editor file. Click it to open Claude Code. You can also:
Click the Spark icon in the Activity Bar (left sidebar)
Use the Command Palette and type "Claude Code"
Click ✱ Claude Code in the Status Bar at the bottom-right of the window
Step 5: Run the Onboarding Walkthrough
After signing in, Claude Code shows a "Learn Claude Code" checklist. Work through it — each item shows you a core feature in action. If you dismiss it and want to revisit it later, go to VS Code Settings → Extensions → Claude Code and uncheck Hide Onboarding.
You can also run "Claude Code: Open Walkthrough" from the Command Palette for a guided tour.
Core Features You Need to Know
Using the Prompt Box
The prompt box at the bottom of the Claude panel is your main interaction point. A few things that aren't obvious at first:
Permission modes — Click the mode indicator at the bottom of the prompt box to switch between:
Normal mode: Claude asks permission before each file edit
Plan mode: Claude writes out a full plan and waits for your approval before doing anything. VS Code opens the plan as a full markdown document where you can leave inline comments.
Auto-accept mode: Claude makes edits without asking. Useful for rapid iteration on non-critical code, risky for production files.
@-Mentions — Type @ followed by a filename to give Claude direct context about a specific file. It supports fuzzy matching, so @auth might match AuthService.ts, auth.js, and auth.config.ts all at once. You can also add a trailing slash to reference entire folders: @src/components/.
For even more precision, select code in your editor and press Option+K (Mac) / Alt+K (Windows/Linux). This inserts an @-mention with the exact file path and line range — something like @app.ts#12-28 — directly into your prompt.
Multi-line input — Press Shift+Enter to add line breaks without sending. Useful for writing longer, more structured prompts.
Reviewing and Accepting Edits
When Claude wants to modify a file, it shows a side-by-side diff of the original and proposed changes. You can:
Accept the changes
Reject them entirely
Edit the proposed content directly in the diff view before accepting (Claude is notified that you modified its proposal)
This review step is what makes the Plan mode + Normal mode workflow so powerful. You're never blindsided by changes to files you didn't expect Claude to touch.
Checkpoints and Rewind
One underrated feature: the VS Code extension tracks Claude's file edits as checkpoints. Hover over any message in the conversation to see the rewind button. You get three options:Claude vs ChatGPT for Programming

Fork conversation from here: Start a new conversation branch from this point, keeping code changes intact
Rewind code to here: Roll back file changes to this moment while keeping the full conversation history
Fork conversation and rewind code: Both at once — start fresh and revert the code
This makes experimenting much lower-risk. Try something, see it break, rewind, try differently.
Session History and Multiple Conversations
The Session history button at the top of the Claude Code panel gives you access to all past conversations, searchable by keyword or browsable by date. New sessions automatically get AI-generated titles based on your first message.
For parallel work, use Cmd+Shift+Esc (Mac) / Ctrl+Shift+Esc (Windows/Linux) or the Command Palette option "Open in New Tab" to start a second conversation. Each tab is fully independent — separate context, separate history. A small colored dot on the spark icon tells you the status: blue means a permission request is waiting, orange means Claude finished while the tab was in the background.
Connecting MCP Servers for Supercharged Workflows
MCP (Model Context Protocol) servers extend Claude Code's capabilities by connecting it to external tools and APIs. For example, connecting the GitHub MCP server lets you ask Claude to review a pull request, check open issues, or create commits all from the chat panel.

To add an MCP server, open VS Code's integrated terminal (Ctrl+` or Cmd+`) and run:
claude mcp add --transport http github https://api.githubcopilot.com/mcp/ \ --header "Authorization: Bearer YOUR_GITHUB_PAT" |
After adding servers through the CLI, manage them directly in the chat panel by typing /mcp. This opens a management dialog where you can enable, disable, or reconnect servers without leaving your editor.
Common Mistakes Developers Make
Using vague prompts. "Fix this" gives Claude almost no context. "Fix this function so it handles undefined input values and doesn't re-render in React when the value hasn't changed" gives it everything it needs. Specificity is directly proportional to output quality.
Not providing framework or constraint context. If you're working in a specific version of Next.js, or you have a performance constraint, or you need to maintain backward compatibility, say so upfront. Claude doesn't guess your constraints; it works with what you give it.
Skipping Plan mode on large tasks. For any task that touches more than two or three files, switch to Plan mode first. Let Claude write out its approach, read it, and give feedback before it starts making changes. This saves a lot of rewind-and-retry cycles.
Ignoring the context window indicator. The prompt box shows how much of Claude's context window is in use. If you're deep into a long conversation and the indicator is getting high, run /compact to compress older parts of the conversation. Running out of context mid-task leads to confused, inconsistent responses.
Not restarting VS Code after installation. If the extension seems installed but nothing appears, always try "Developer: Reload Window" before assuming something is broken.
Pro Tips for Power Users
Use the CLI for features the extension doesn't expose. The VS Code extension covers most workflows, but some things like tab completion, the ! bash shortcut, and full MCP server configuration — are only available in the CLI. Open the integrated terminal and run claude to access them. The CLI and extension share the same conversation history, so you can switch back and forth seamlessly.
Run claude --resume to continue an extension conversation in the terminal. This opens an interactive picker where you can search for and select a conversation to continue in CLI mode.
Use git worktrees for isolated parallel tasks. The --worktree flag starts Claude in an isolated git worktree with its own branch and files:
Bash claude --worktree feature-auth |
This lets you work on separate features in parallel without Claude instances interfering with each other.
Set a JSON schema for settings autocomplete. Add this line to your ~/.claude/settings.json to get autocomplete and validation for all Claude Code settings directly in VS Code:
json { } |
Use @terminal:name to reference terminal output. Instead of copy-pasting error messages, type @terminal:Terminal (or whatever your terminal's title is) in the prompt box and Claude reads the terminal output directly. Huge time saver for debugging build errors or test failures.
Connect Claude to Chrome for browser automation. Type @browser followed by an instruction to have Claude interact with your running web application, check the console for errors, or automate browser tasks. This requires the Claude in Chrome extension (v1.0.36+) to be installed and connected.
Real-World Use Case: Refactoring a React Authentication Module
Here's a concrete example of how this looks in practice. Say you've inherited a React app with a messy authentication module, three components, tangled state, and a useEffect that nobody fully understands.

Step 1: Switch Claude to Plan mode.
Step 2: Select the main auth component file, press Alt+K to add it as an @-mention, then add the other two related files the same way:
Review @AuthProvider.tsx @LoginForm.tsx @useAuth.ts The auth module has tangled state between the provider and the form. The useEffect in AuthProvider is causing unnecessary re-renders. I want to: 1. Move authentication state to a proper context 2. Extract the token refresh logic into a separate hook 3. Add proper TypeScript types throughout Don't change any external API contracts or prop interfaces. |
Step 3: Claude generates a plan. You read it, notice it missed something about the token expiry handling, and add a comment directly in the plan document. Claude incorporates your feedback.
Step 4: Claude executes, showing you a diff for each file. You review each change, accept the ones that look good, and reject the one change to LoginForm.tsx that introduced a prop you don't want.
Step 5: You run your tests. They pass. Total time: about 12 minutes for a refactor that would have taken 90 minutes manually.
That's the workflow. Claude handles the mechanical transformation; you handle the judgment calls.
FAQ:
The VS Code extension bundles the Claude Code CLI binary, so you generally don't need a separate Node.js installation just to use the extension. However, if you want to install or update the CLI separately via npm, you would need Node.js. For most users, installing the extension directly from the VS Code Marketplace is all that's required.
Claude Code requires either a Claude.ai subscription (Pro plan or higher) or an Anthropic API key. The extension itself is free to install, but usage is billed through your Anthropic account based on model usage. Check the current pricing at anthropic.com for up-to-date plan details.
Yes. The Claude Code extension installs in Cursor, Windsurf, Kiro, and other VS Code-based editors. Search for "Claude Code" in their Extensions view, or install via the Open VSX registry if their marketplace doesn't carry it directly.
Copilot is primarily an inline autocomplete tool that predicts what you're about to type. Claude Code is an agentic assistant that can plan, edit multiple files, run terminal commands, and reason through complex tasks. They serve different purposes, and many developers use both: Copilot for autocomplete while typing, Claude Code for larger refactoring and debugging tasks.
Make sure you're in Normal mode or Plan mode, not Auto-accept mode. In Normal mode, Claude asks permission before every file edit. In Plan mode, it writes a plan first and waits for approval before touching anything. You can set your default mode in VS Code Settings → Extensions → Claude Code → initialPermissionMode.
First, check your internet connection. Then try starting a new conversation. If neither works, open VS Code's integrated terminal and run claude directly; this often surfaces more detailed error messages. If the problem persists, reload VS Code with "Developer: Reload Window" or file an issue on the Claude Code GitHub repository.
Claude Code reads the files you explicitly share with it (through @-mentions, selections, or when you're in a project directory). Anthropic does not use your code to train models. For full details on data handling and how to opt out of usage logging, see the Data and Privacy section in the official Claude Code documentation at code.claude.com.
Final Verdict

If you're serious about using AI to accelerate your development workflow, the Claude Code VS Code integration is one of the most capable tools available right now. The combination of a reasoning-focused model, deep editor integration, plan mode, inline diff review, and checkpoints makes it genuinely useful for complex, real-world tasks not just generating boilerplate.
The learning curve is low. Installation takes about five minutes. The difference in daily productivity, especially for tasks like refactoring legacy code, debugging tricky async issues, or understanding an unfamiliar codebase, is significant enough to justify making it a permanent part of your setup.
Start with Plan mode turned on. Be specific in your prompts. Use @-mentions to give Claude exactly the context it needs. And use the rewind feature liberally it removes the fear of letting Claude try something ambitious.
Schema FAQ (Structured Data)
{ "@context": "https://schema.org", "@type": "FAQPage", "mainEntity": [ { "@type": "Question", "name": "How do I install Claude Code in VS Code?", "acceptedAnswer": { "@type": "Answer", "text": "Open the Extensions panel in VS Code (Cmd+Shift+X on Mac or Ctrl+Shift+X on Windows/Linux), search for 'Claude Code', and click Install. You need VS Code version 1.98.0 or higher. After installation, sign in with your Anthropic account when the panel first opens." } }, { "@type": "Question", "name": "Is Claude Code for VS Code free?", "acceptedAnswer": { "@type": "Answer", "text": "The extension is free to install, but using Claude Code requires either a Claude.ai Pro subscription or an Anthropic API key. Usage is billed through your Anthropic account." } }, { "@type": "Question", "name": "What VS Code version does Claude Code require?", "acceptedAnswer": { "@type": "Answer", "text": "Claude Code requires Visual Studio Code version 1.98.0 or higher. Check your version under Help → About and update if necessary before installing the extension." } }, { "@type": "Question", "name": "How is Claude Code different from GitHub Copilot in VS Code?", "acceptedAnswer": { "@type": "Answer", "text": "GitHub Copilot focuses on inline code autocomplete as you type. Claude Code is an agentic AI that can plan tasks, edit multiple files simultaneously, run terminal commands, reason through complex problems, and review its own changes — making it better suited for larger refactoring, debugging, and architecture tasks." } }, { "@type": "Question", "name": "Can I use Claude Code in Cursor or other VS Code forks?", "acceptedAnswer": { "@type": "Answer", "text": "Yes. The Claude Code extension works in Cursor, Windsurf, Kiro, and other VS Code-based editors. Search for 'Claude Code' in their extension marketplace or install via the Open VSX registry." } } ] } |
Featured Snippet Answer
How to use Claude Code in VS Code: Install the Claude Code extension from the VS Code Marketplace (requires VS Code 1.98.0+). Search for "Claude Code" by Anthropic, click Install, then sign in with your Anthropic account when the panel opens. Click the Spark icon in the editor toolbar to open the chat panel, select Plan mode for safe task execution, use @-mentions to reference specific files, and review inline diffs before accepting any changes.